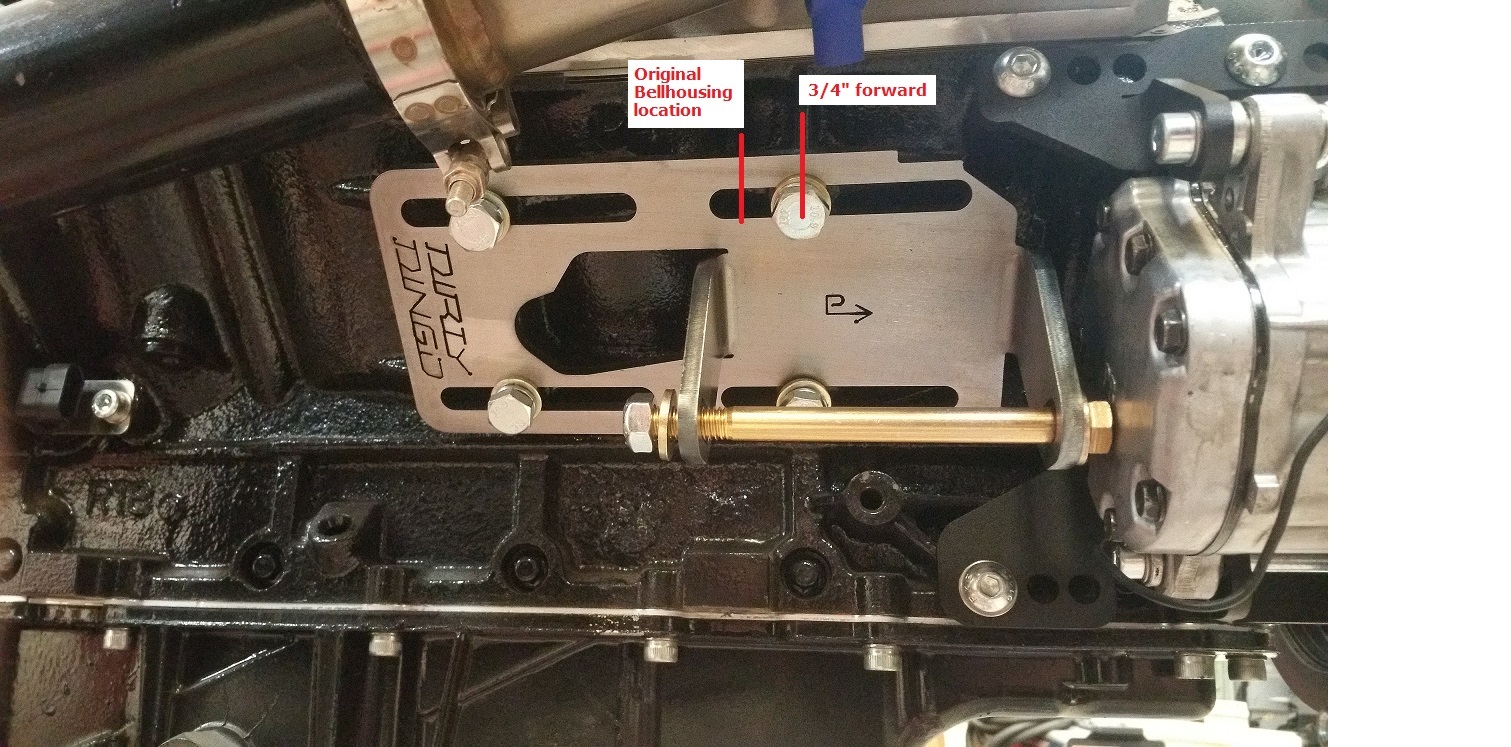
All threaded holes in the block and cylinder head should cleaned and tapped with a thread chaser. All bolts being installed should be lubed with a light oil or anti-seize on the bolt threads before assembly.
If your block does not have the bottom hole drilled, you will need to drill this hole.
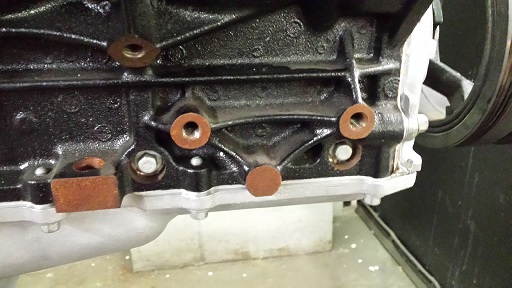
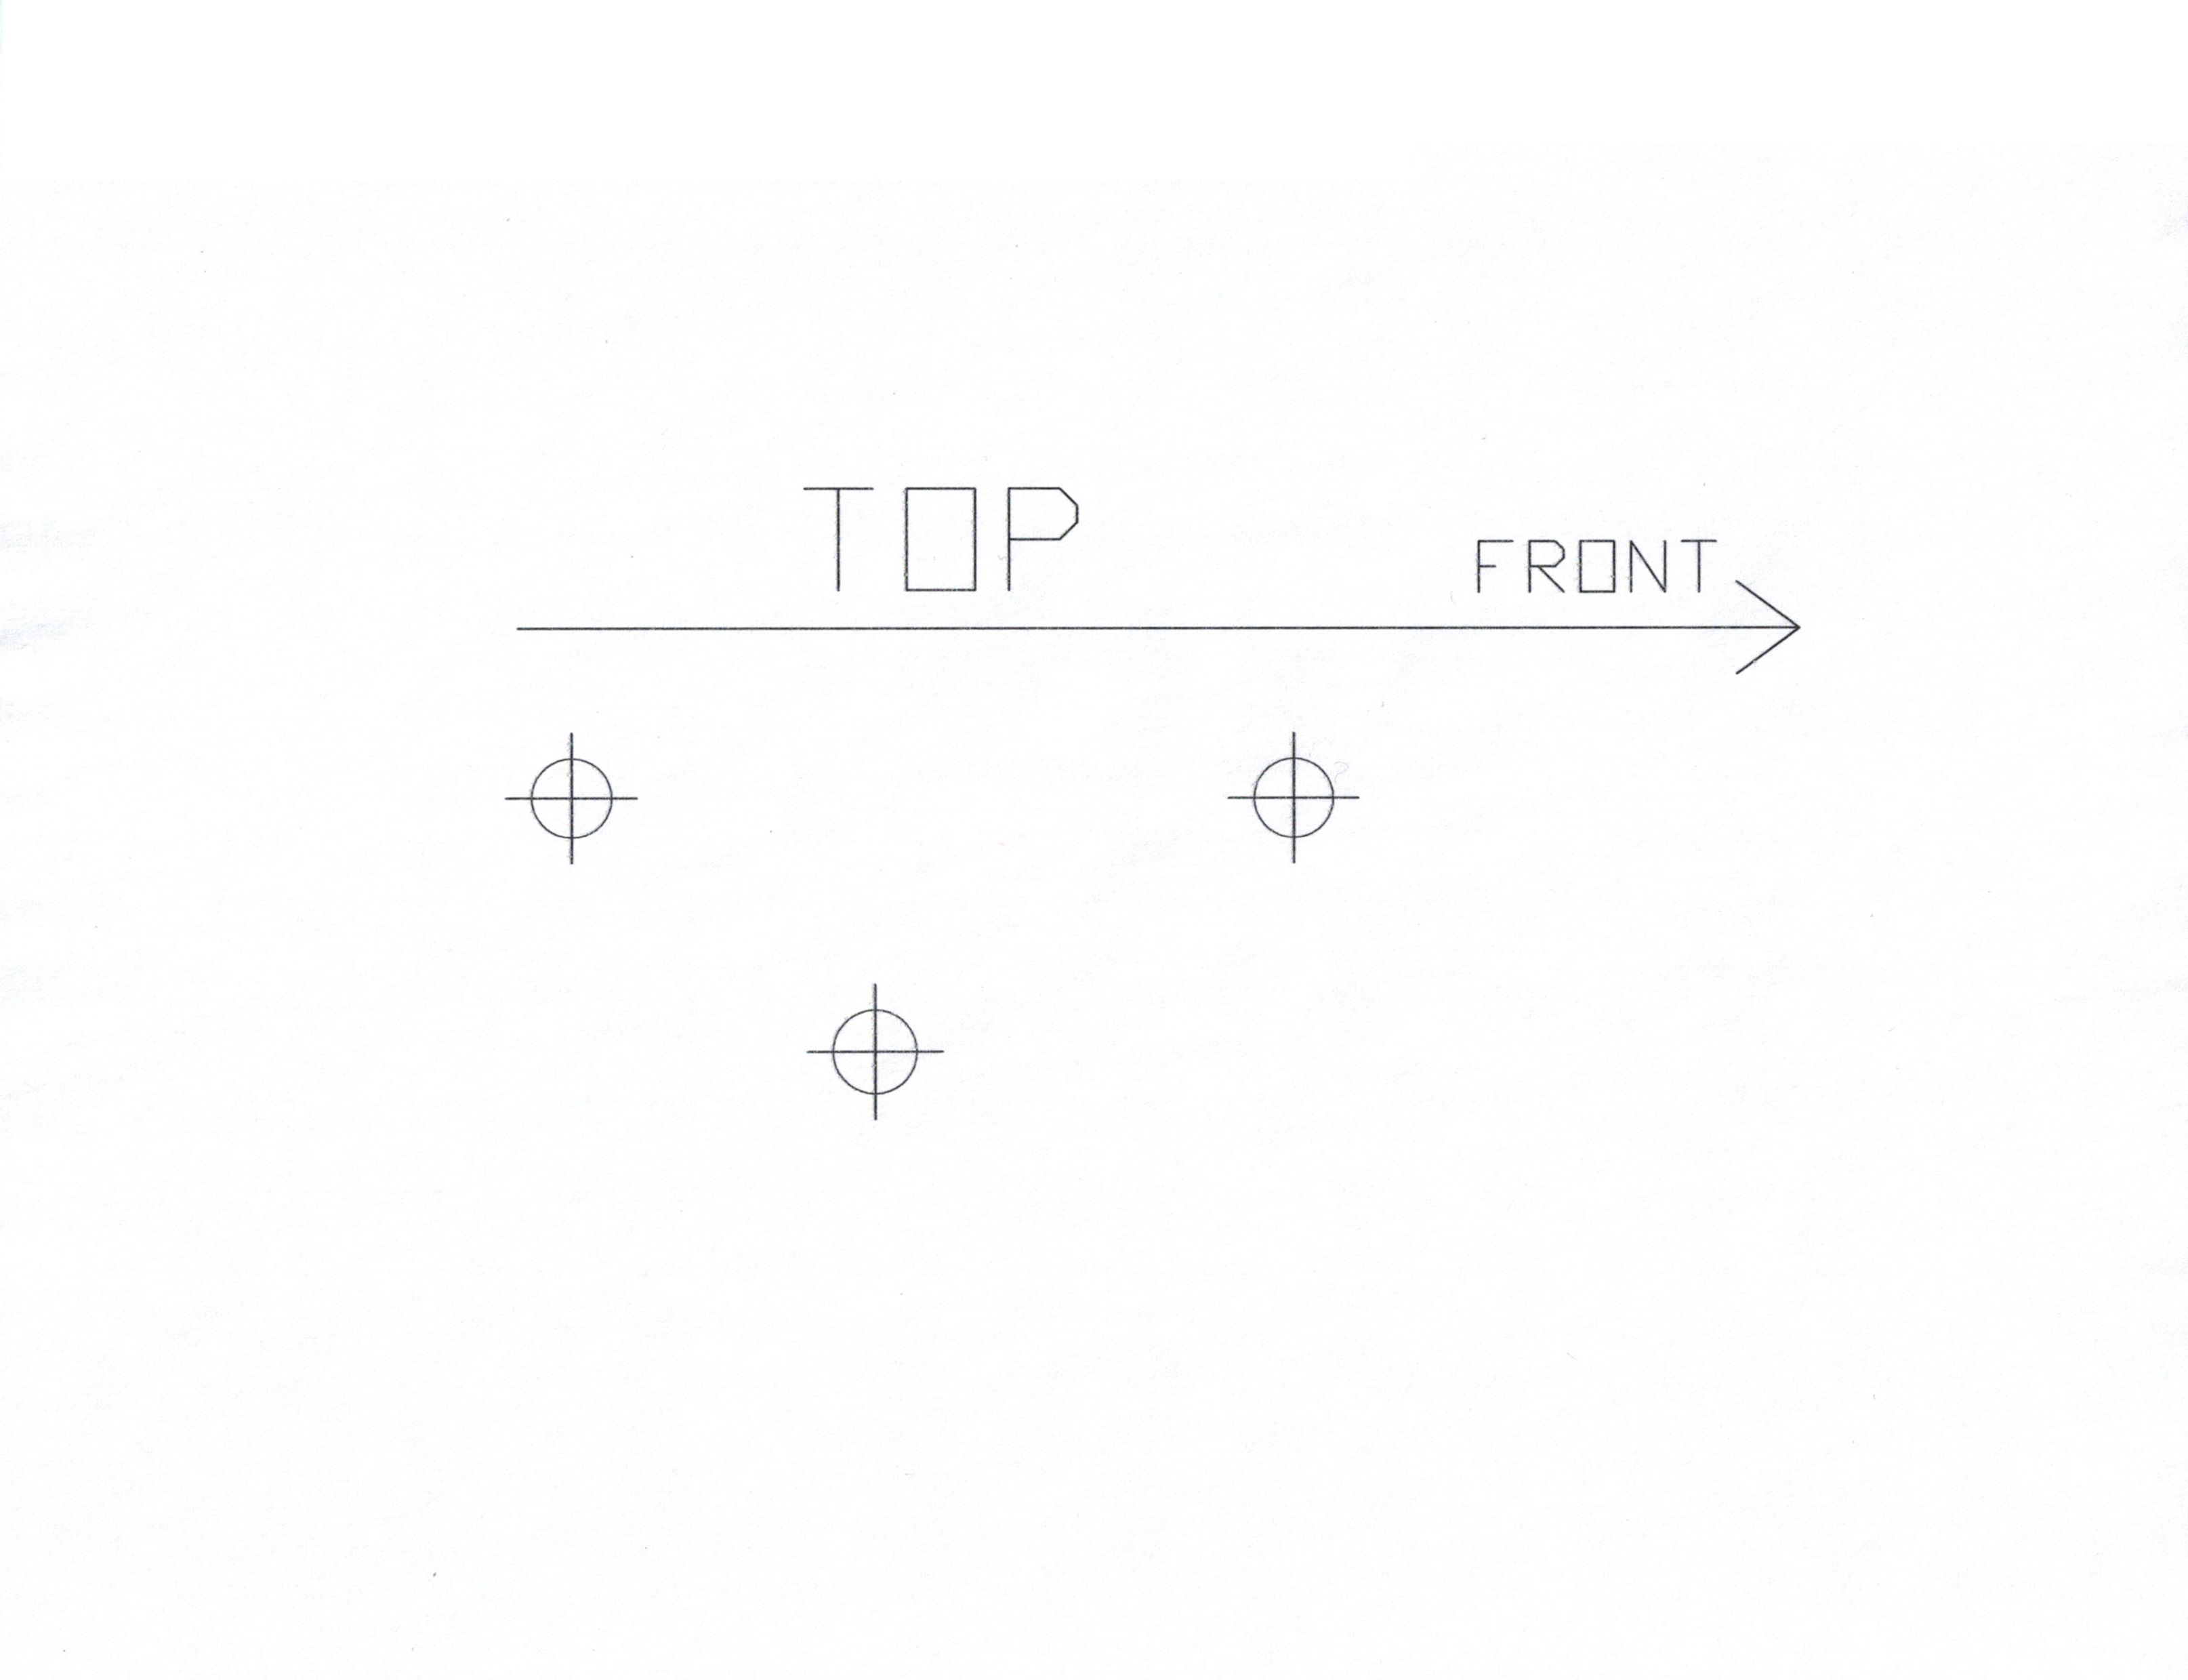
You can download this picture and print it out for a hole location pattern. After the block is marked you can install the bracket using the front bolt and use a transfer punch that just fits through the hole of the bracket. This should be drilled with a .339 drill bit 3/4" deep and tapped with a 10MMx1.5 tap 1/2" deep.
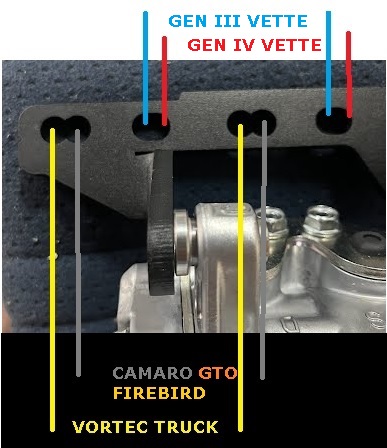
There are three different positions that you can mount this kit. Corvette-G8, 1998-02 Camaro-Firebird-GTO, and 2010-15 Camaro-Truck-VVT spacing. Placing the bracket to the forward position (rear set of holes) will be 2010-15 Camaro-Vortec Tuck-VVT spacing. Moving the brackets to the next set of holes will be 1998-02 Camaro-Firebird-GTO (middle set) spacing, then Corvette-G8 (front set of holes) spacing will put the compressor at the furthest position inward towards the rear. The brackets in these installation instructions are in the 2010-15 Camaro-Truck-VVT position. Install the bottom bracket using 2 10MM X 25MM button head allen bolts with stainless washers as shown. Torque bolts to 28 ft. lbs. (The sliding bushings in the AC compressor must not be fully seated to fit the bracket properly. As you tighten the bolt it will pull the bushing into the proper place.)
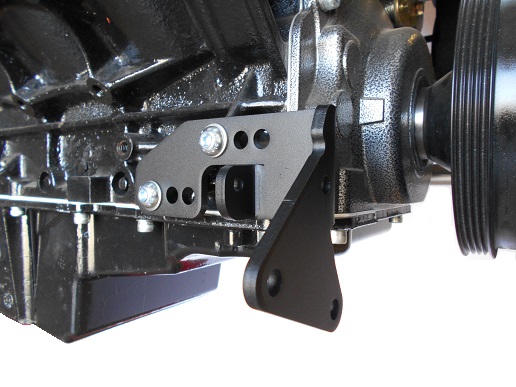
Slide the lower compressor ears over the bracket and install the 8MM X 100MM bolt and stainless washer. This bolt fits through both compressor ears and threads into the front compressor ear. Do not tighten bolt.
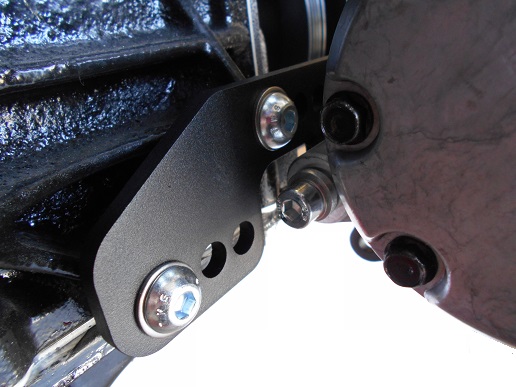
Install the top bracket using 2 10MM X 40MM button head allen bolts with stainless washers and spacers "A" underneath the bracket as shown. Torque bolts to 28 ft. lbs.
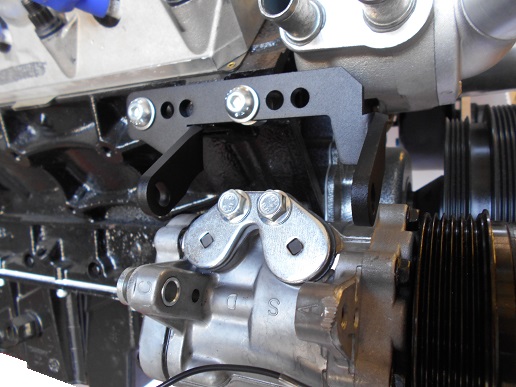
Rotate compressor up to line up top bracket with compressor holes. The front bolt 8MM X 20MM threads into the compressor ear with a stainless washer. The rear bolt 8MM X 40MM uses 2 stainless washers and a lock nut. Torque the top and bottom compressor bolts to 18 ft. lbs. The sliding bushing must be seated into compressor fully to fit properly. As you tighten the bolt it will pull the bushing into the proper place.
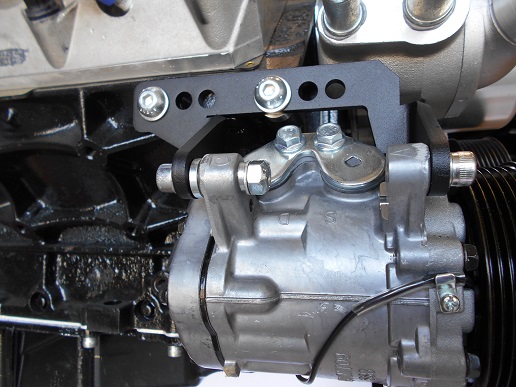
Mount the tensioner to the lower bracket.
Corvette-G8 balancer spacing uses 2 10MM X 40MM socket head bolts- stainless washers on both sides and lock nuts- placing spacers "B" between the tensioner and the bracket as shown. There will be two extra 50MM socket head bolts.it
(Update) The newly designed brackets will fit Gen III and Gen IV Corvette balancers. The new bracket is slotted for Corvette. If you are using a Gen III balancer you will slide the bracket towards the front of the engine, for Gen IV balancers you will slide the bracket towards the rear of the engine.
1998-02 Camaro-Firebird 2004-06 GTO balancer spacing uses 2 10MM X 50MM socket head bolts- stainless washers on both sides and lock nuts- placing spacers "C" between the tensioner and the bracket as shown. There will be two extra 40MM socket head bolts.
Truck/VVT/2010-15 Camaro balancer spacing uses 2 10MM X 50MM socket head bolts- stainless washers on both sides and lock nuts- placing spacers "D" between the tensioner and the bracket as shown. Torque bolts to 28 ft. lbs. There will be two extra 40MM socket head bolts.
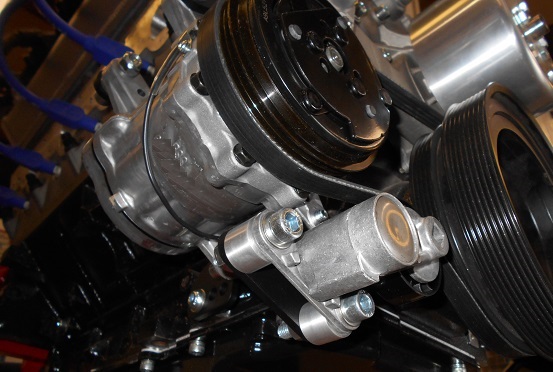
Install the belt using the factory 4 rib belt location on the balancer. 2010-15 Camaro-Vortec Truck-VVT and 1998-02 Camaro-Firebird-GTO spacing the belt will be at the front of the clutch pulley on the compressor exposing 2 ribs on the rear of the clutch pulley. Corvette spacing the belt will be at the rear of the clutch pulley exposing 2 ribs on the front of the clutch pulley. Place belt behind the balancer between the balancer and the timing cover, then over ac clutch and on top of tensioner. Push tensioner down and slip belt from the back side of the balancer onto the factory rear 4 rib pulley on the balancer.
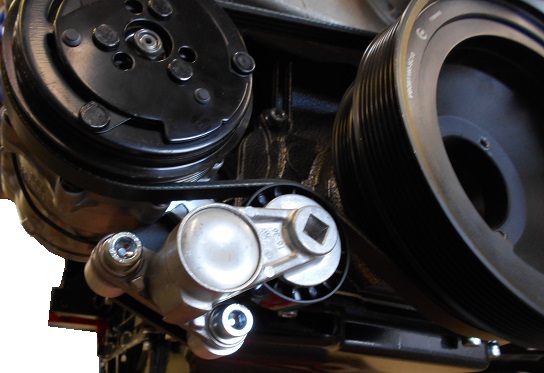
Replacement tensioner click here
Belt Sizes-
Corvette balancer- Dayco 360K4, Gates K040360
1998-02 Camaro Balancer- Dayco 360K4, Gates K040360
Vortec Truck- Dayco 365K4, Gates K040365
VVT Engines- Dayco 370K4, Gates K040372
